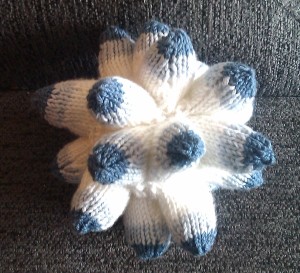
 As an avid knitter, and mathematician, the birth of a small human in my family inspired me to create a mathematical toy for the tiny person to enjoy while learning about shapes. With my favourite platonic solid being the icosahedron, it was the obvious choice for a knitted toy, and with stellation being all the rage, sticking a point on each face was the obvious next step, especially when it’s such a convenient thing for tiny inexperienced hands to grasp.
This knitted icosahedron pattern is my attempt at a knitting pattern for said object, although I’m not hugely experienced at writing knitting patterns, so it might be slightly confusing (but it definitely works, as I’m knitting my second toy now). Strictly, it’s not stellated, as a stellation is conventionally not nearly so pointy – the triangles in this stellation are majestically isoscles – but it’s the right idea.
Stellated icosahedron
(click here to download a printable PDF)
An icosahedron is a 20-sided shape where each face is an equilateral triangle, and at every corner 5 triangles meet. They’re quite pretty, and this toy is based on an icosahedron with a triangular pyramid replacing each triangular face. This makes it ‘stellated’ – literally, like a star, but in practice, pointy all over. This pattern will produce a toy roughly 6 inches across.
You will need:
- DK or baby wool in 3 colours – I’ve used white, baby blue and dark blue though any 3 colours is fine. My design has broad stripes, but narrower stripes or plain colour would work too, and you can adapt it as you wish.
- Set of double pointed needles, suitable for your wool (I used 3.5mm)
- Wool needle and scissors
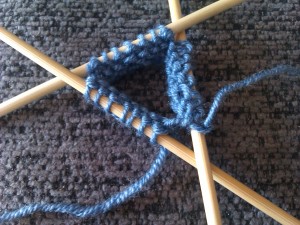
 Using double pointed needles, cast on 21sts in your first colour and distribute evenly across three needles. Knit in the round for 3 rows, then knit the fourth row as K5K2tog ×3. Knit another three rows, then K4K2tog ×3 for the fourth row. Change to the second colour (knot the wools together, and break leaving an inch-long tail then leave the ends dangling inside). Knit three rows in this colour, then K3K2tog ×3 for the fourth row.
Change to the third colour, knit three rows in this colour, then K2K2tog ×3 for the fourth row leaving 3sts on each needle. Break the yarn, leaving a 5 inch tail, and use a wool needle to thread this end through all 9 stitches, working round in a circle and pull tight. Push the needle through the centre of the top, turn inside out and tie off by making a stitch and putting the needle through the loop before pulling tight. This should leave you with a triangular cone. There will be 20 of these in your finished piece.
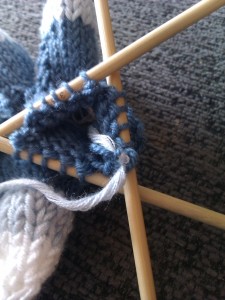
 Starting with the first colour again, pick up 7sts along the bottom edge of your cone (along what was one needle’s worth of stitches, using your thread tail to find the corner) working from left to right as you look at the upright cone, and then cast on another 14sts, making another triangle on three needles as before. Repeat the process to make another cone.
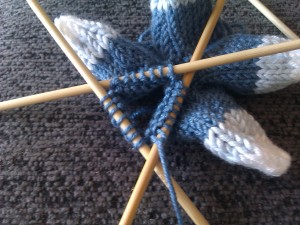
Start your next cone on a free edge of your second cone, and your fourth cone on the free edge of the third nearest to the existing cones. For your fifth cone, you can pick up one edge from your fourth cone and one from your first, making a circle of five cones. If there’s a hole in the middle, turn the whole thing upside down and use some thread (or one of your loose hanging threads) to sew around the hole, using a wool needle, and pull tight to close up the hole.
 Continue knitting cones by picking up 7sts from an existing cone, and always making sure there are 5 cones meeting at a point (not 4 – it’s easy to do this by accident). Each time you get a circle of 5 cones, close up any hole in the middle as before. If you’re not sure, look at this picture of an icosahedron and check what you’re doing looks right.
When you have finished, you should have 20 cones arranged so there are 5 around each point, and the last one will be knitted from edges picked up from three existing cones. This will be slightly more awkward to knit but should be done in the same way. Before you knit this cone, stuff the inside of the toy (all the way up to the points) with flame retardant toy stuffing, and continue filling the final cone as you knit it, so the whole thing is stuffed when you tie off.
Enjoy your stellated icosahedron!
My inspiration was this description of a knitted toy from the blog at Pepper Knit, where she’s also done a dodecahedron (as well as many other lovely knitted items).
Have you knitted anything mathematical? Would you like to see more regular (maths ∩ knitting)-based posts here on the Aperiodical? Please post a comment below.