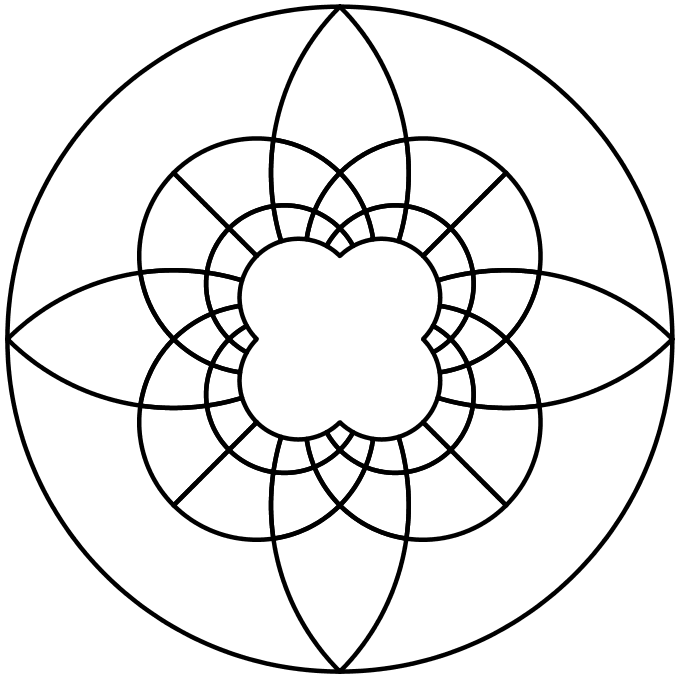
In the Aperiodical’s Big Internet Math-Off 2019, Becky Warren posted an entry about Geogebra’s ‘reflect object in circle’ tool (it’s the second article in the post). I enjoyed playing with the tool and, after making a few colourful designs, it occurred to me that one of them would make a great cake for the MathsJam bake-off. It would only work if the curves were accurate; sadly this would be beyond my drawing abilities, and definitely beyond my piping abilities. But with some help from 3D printing I thought I might be able to manage it.
Here are the steps I used to transfer the design to a cake.
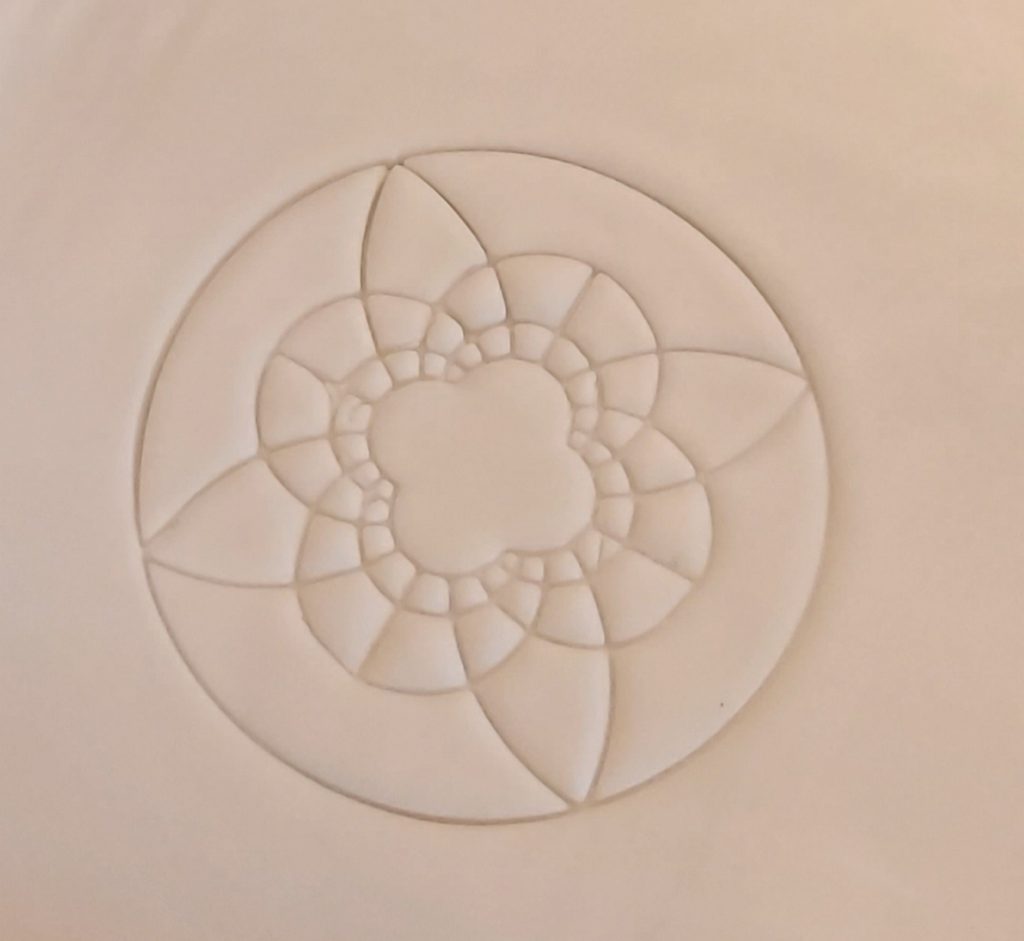
Step 1 (Geogebra) – Save as an image
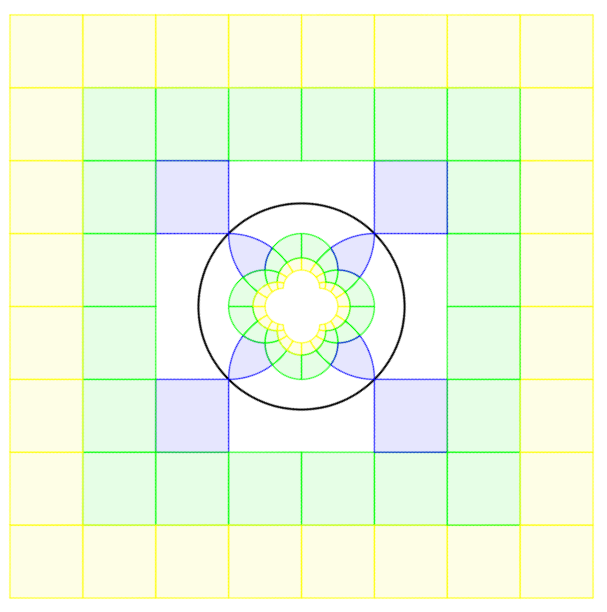
I started by simplifying the design. Squares are straightforward, so I only needed the part within the centre circle. I hid all the squares and removed all the colours, then thickened the lines to make them easier to see. Finally, I took a screenshot and saved it as a bitmap image.
Step 2 (Inkscape) – Convert image to path and generate scad
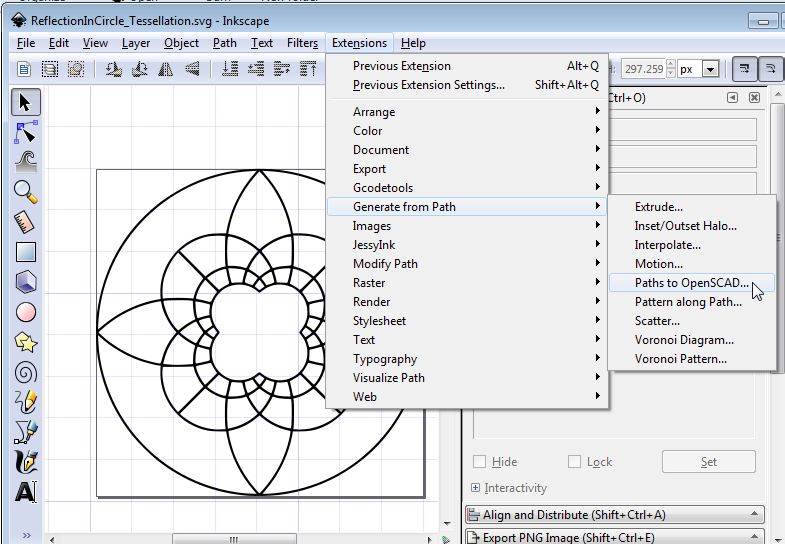
The next step was to use Inkscape to convert the image into an OpenSCAD file that can be used for 3D printing. If you google ‘Inkscape OpenSCAD’ you’ll find several extensions that will do this; I used Paths2OpenSCAD.
To generate the scad, start by importing the image into Inkscape. Then, with the image selected, go to Path > Trace Bitmap. This opens up a window with lots of options; accept the default and click OK, then close the window. Inkscape has now converted the image into a vector path; this means that it has coordinates for each point on the path.
Now go to Extensions > Generate from Path > Paths to OpenSCAD. This opens up another window. In the output file box, enter the location to save the scad file, then click OK. Now you can open the file in OpenSCAD.
Step 3 (OpenSCAD) – Scale design
The generated OpenSCAD file starts like this.

It has a method called ‘poly_path854’ (a new number is generated for each file). This method uses the coordinates of the points on the path from Inkscape to make a polygon in OpenSCAD.
Pressing F5 to preview shows a replica of the image, rendered as a 3D model.
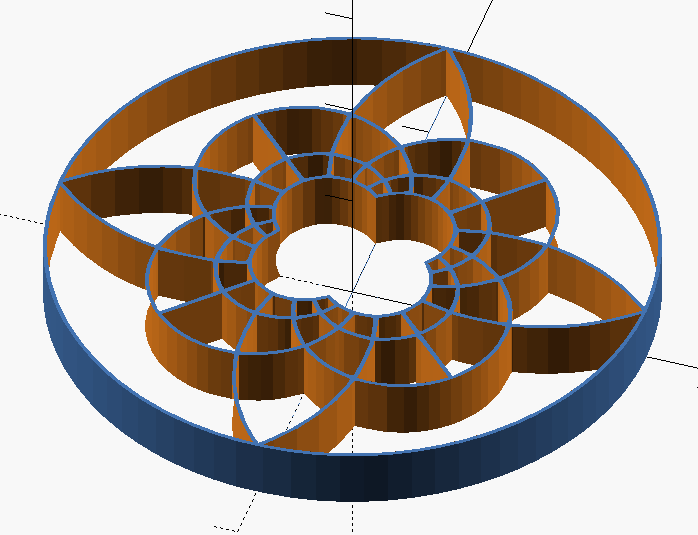
At the very end of the file is a line that calls the ‘poly_path854’ method, passing in a number. The number is the height of the object when printed – you can change this to suit your needs.
The part that I found difficult was to work out the size the model would be when it was printed. The axes on the OpenSCAD preview window give some indication, but it’s not possible to read accurate values from it. I wanted my model sized appropriately to match a square cutter that I already owned. In the end, I printed out a 1 mm high model so that I could measure the original size without wasting too much plastic, then I scaled the entire model to match the square cutter. The final line of the file became
scale([6/(4.2*sqrt(2)),6/(4.2*sqrt(2)),1]){
     poly_path854(5);
 }
Step 4 – Print
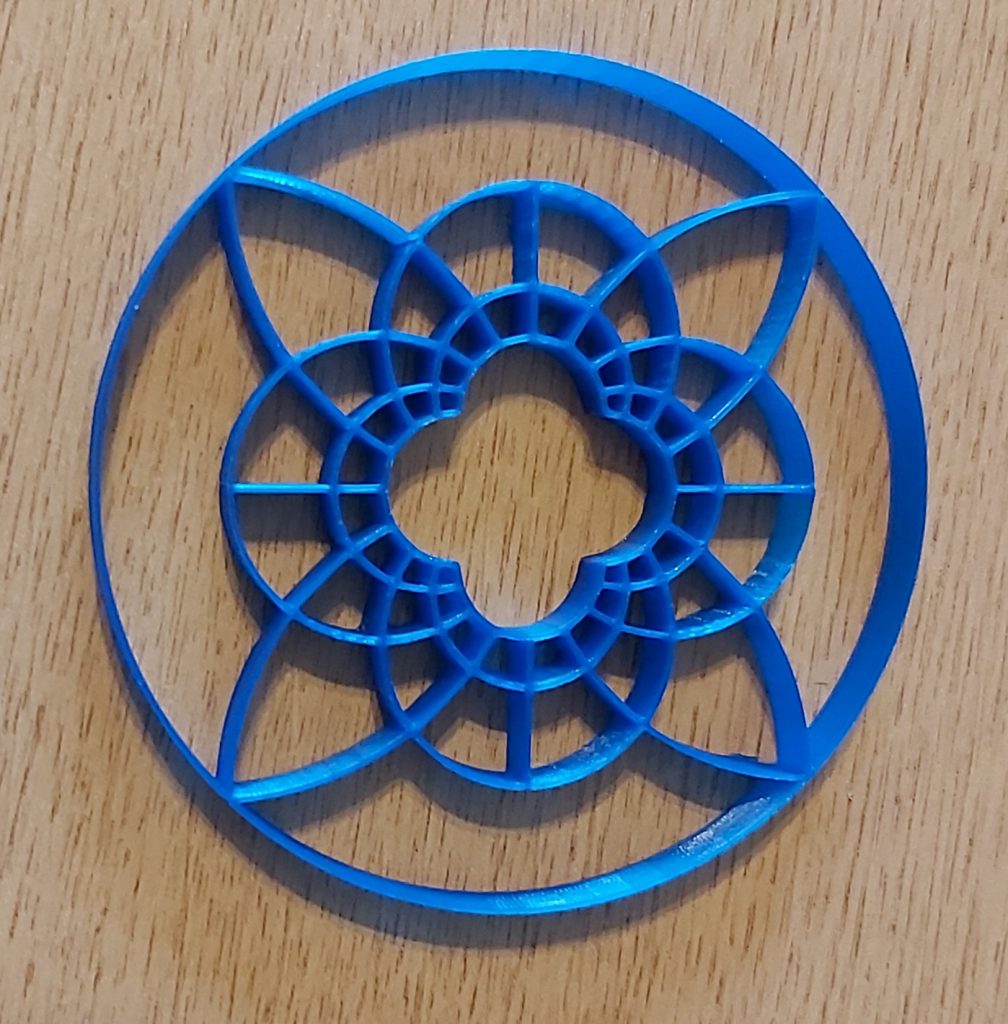
I sent the model to the printer, and a few hours later I had my cutter!
Step 5 – Imprint on cake
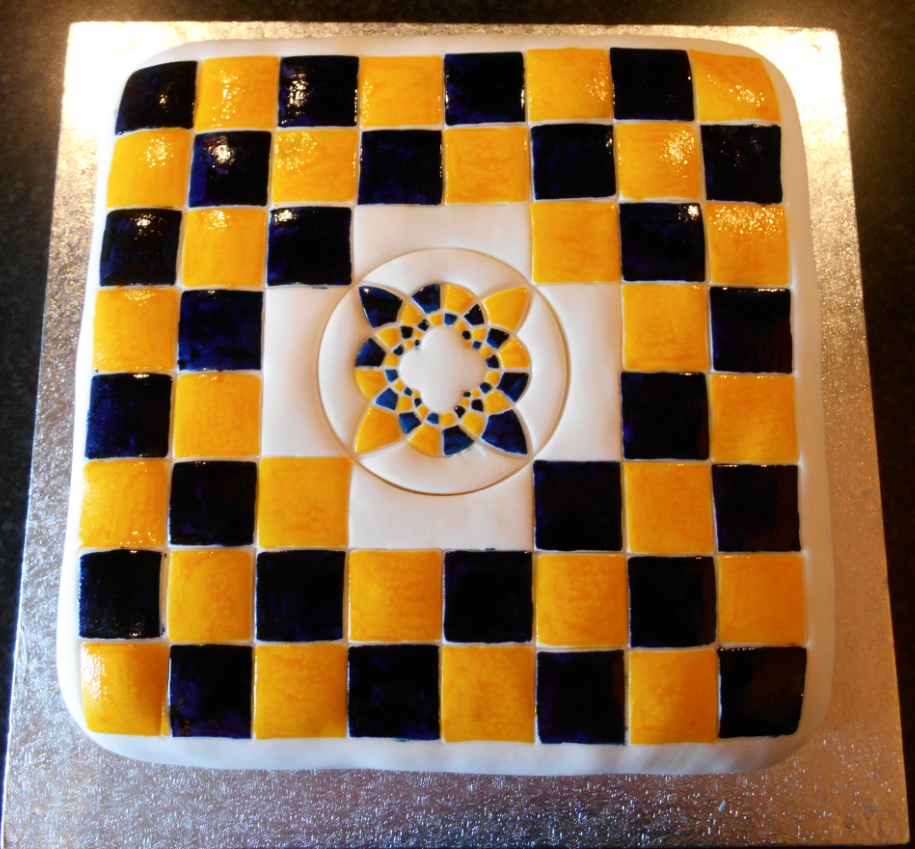
Once I had baked the cake and covered it in fondant, I used the cutter to make an imprint of the design on the icing.
Now it only remained to cut the squares around the edges and give it some colour. I used a small amount of vodka to thin out paste food colouring so that I could paint on the fondant icing. (Honestly, it was a tiny amount of vodka – less than 5 ml over the entire cake.)
That’s it! Geogebra to cake in five steps. Here’s the finished cake, alongside the original design in Geogebra.