Tricurves were introduced to the Aperiodical audience via Tim Lexen‘s posts Bending the Law of Sines, Combining Tricurves, Phantom Tiling, and (joint with Katie Steckles) Making Tricurves. Like Tim and Katie in that last post, when introduced to a new concept I like to play around with it to see it from different perspectives. Tiling is a topic in maths that is near enough to my speciality that I feel I should be able to understand it, but far enough that I don’t feel any pressure to be an expert – perfect conditions for playing with the concepts.
Not having access to a laser cutter, I tend to do my experiments on a computer. Playing around with the ideas in Phantom Tiling, I created a few animations, such as this one, to explore what was going on.
Another tricurve drawing.
— Andrew Stacey (@loopspace@mathstodon.xyz) (@mathforge) November 4, 2018
Made with @ProcessingOrg in #python mode.@aperiodical @beesandbombs pic.twitter.com/NxRydGG7tN
After playing with it a bit, I found it reminded me of some other experiments I’d done with some other tilings. So the story begins long, long ago in a country far, far away.
Norway, in case you’re interested.
Penrose Tiles
To set the scene for this article, I need to start with Penrose tiles. Many years ago, before I became a teacher myself, I was given the opportunity to do a Maths day in a school. I chose to base the day on Penrose tiles, which meant that I first had to learn a bit about them myself. In part for that day, and in part inspired by a question on the TeX stackexchange site, I wrote a few bits of code for Penrose tiles, one of which eventually became a LaTeX package for drawing them.
One of the things that I learnt was that there are two ways to implement the matching rules. The standard method is to decorate the tiles with curves so that when tiles are placed alongside each other then the curves have to match. Examples of the rhombus tiles can be seen below.
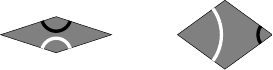
There is another method, though, which is to deform the sides into curves. This is used to great effect by Edmund Harriss in his laser-cut tiles. The deformations ensure that sides only match against the sides that they are allowed to be against. The figure below gives an example of deformed tiles.
Another thing that I learnt about Penrose tiles is that they have a replacement rule. It is possible to define a way to replace each tile by smaller tiles so that when starting with a valid tiling the result is still valid. Each tile is not replaced exactly in place, but the overall effect is that the replacements fit together correctly.
These two aspects of Penrose tiles complement each other. If we apply the replacement rule to a tile, but then think of the new tiles as one unit, we are effectively redrawing the sides of the original tile. Continuing this gives a fractal version of the original Penrose tile with the same area as the original but infinite perimeter. After a few iterations, the tiles look like the following.
There are therefore three closely related concepts that I’m aware of when I consider a set of tiles:
Tiles with matching rules,
Side replacements,
Tile replacement rule.
Squares
Before looking at tricurves, I want to show how these concepts play out for a simpler case than Penrose tiles. As well as being a good preparation for tricurves, it also shows how these ideas – which I initially learnt about for one of the more complicated tilings around – can lead to interesting outcomes even from a very straightforward starting place.
Consider a square tiling, as below.
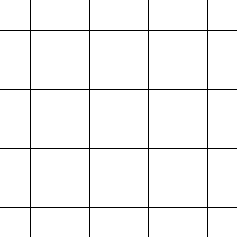
The basic tile is obviously a square, except that we’re going to apply a matching rule so that the squares above are not just translated copies of the original square. The matching rule we impose is that the top and bottom edges can go alongside the side edges, but not against themselves or the other. This means that neighbouring squares are oriented at right-angles to each other. We can adorn the squares with a line to indicate their orientation, leading to the following pattern.
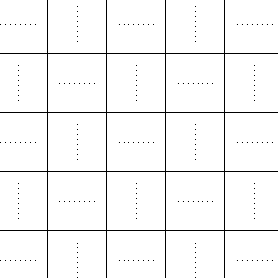
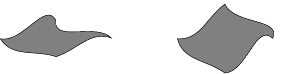
With side replacement, this means that the top and bottom mirror each other while the sides are the opposite. We can see this by decorating the square or by replacing the sides, both as below.
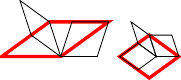
Where this gets interesting is with the tile replacement. There is a replacement scheme for this tile which replaces the single square by two smaller squares as below.

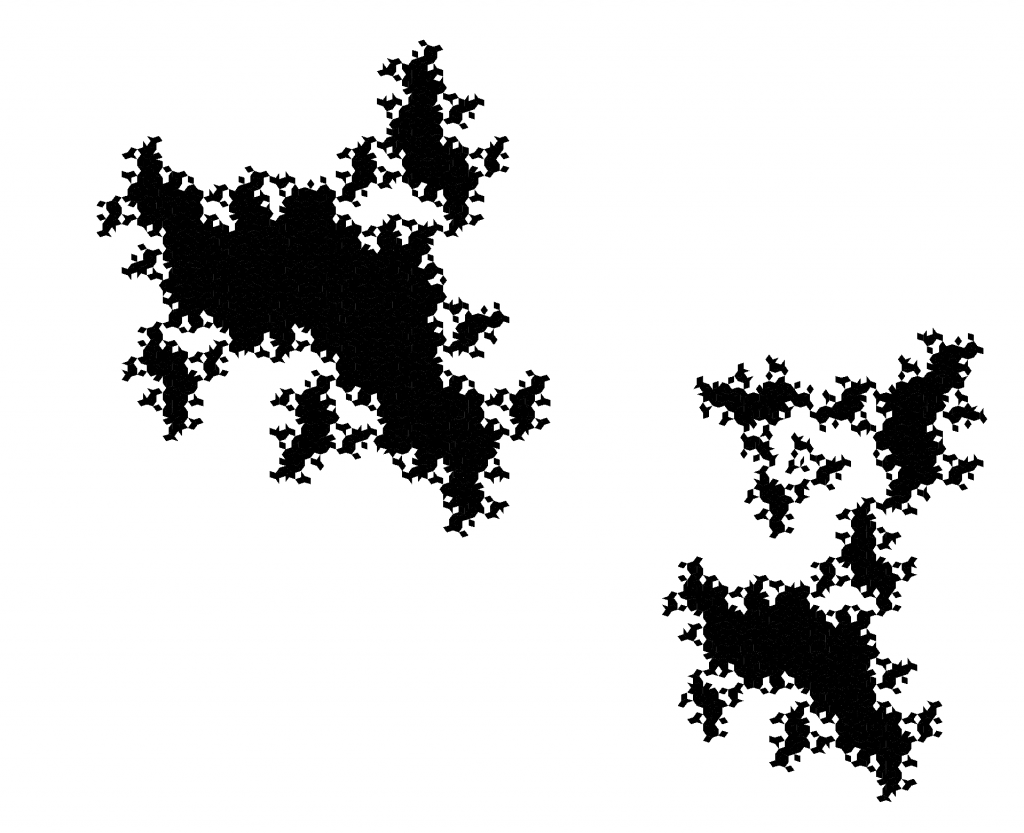
Repeating this replacement leads to the following famous image.
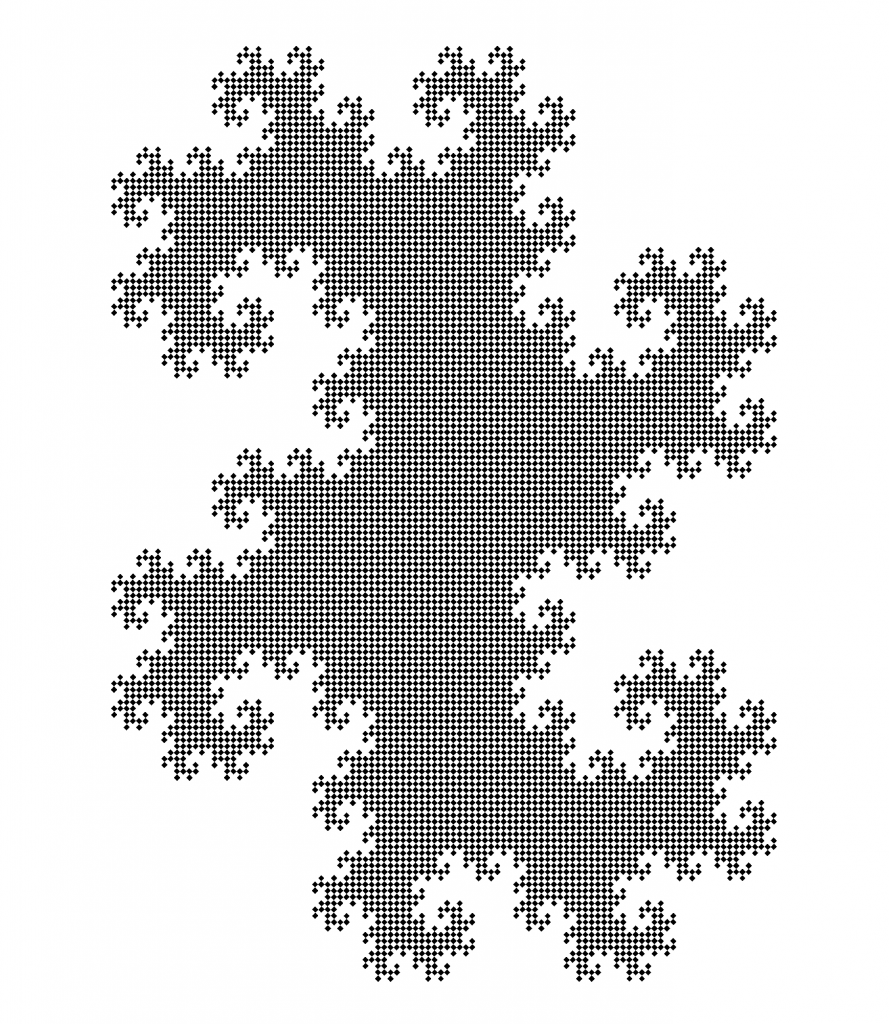
So a simple matching rule with a straightforward tile replacement leads from the square to the dragon curve.
Tricurves
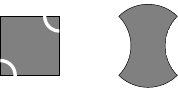
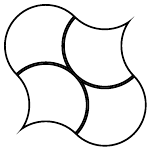
We’re now ready to look at tricurves. I’m going to work through the 90°–90°–180° tricurve as it’s the one that I’ve looked at in most detail. This looks like a scallop:

Back when I was a lecturer, I would introduce a certain topic by explaining that there were three types of question in Mathematics:
I started with X, I did Y, what did I get? (forward)
I did Y, I got Z, what did I start with? (reverse)
I started with X, I got Z, what did I do? (confusing)
In this case, the fact that we are seeing curved edges suggests that the 90°–90°–180° tricurve (and tricurves in general) are the answers to a side-replacing problem. Which means that the question is to figure out the original tile. An initial guess might be to simply join the obvious vertices, producing a right angled triangle.

The problem with this is that side-replacement doesn’t change the overall area. (I should qualify that: it doesn’t change the overall area in an appropriately proportioned tile set; but here we only have one tile so we don’t need to think about that.) What is important to realise is that although every vertex of this tile must be a vertex of the original shape, the side-replacement process can hide vertices. After playing with placing these tiles next to each other, we soon realise that the large curved edge should really be thought of as two edges since half of it is used when placing it next to another tile.
Once we realise this, we can see that there is a hidden vertex at the middle of that larger curved side. Joining the dots now reveals the original tile: a square.

But not just any square: the side-replacement reveals the matching rule. The top and left sides can go against the bottom and right sides, but not against themselves or each other. One decoration that achieves this is shown below.

The last part of the story is tile replacement. Here, sadly, the story is a bit of an anti-climax. The difficulty is related to symmetry. When considering a tile with matching rules, symmetries have to take into account the matching rules. They don’t have to preserve them “on the nose”, but they do have to play nice with them. The matching rules on our original square allowed us to keep the full symmetry group of the square since the diagonal reflections and quarter-turn rotations swapped the sets of matched sides – this is allowed under “play nice”.
This new square does not have the full symmetry group. The vertical and horizontal lines of reflection symmetry do not “play nice” since they fix one pair of opposite sides but swap the others which means that two sides keep their original matching but the other two swap them. The only symmetries left are the diagonal reflections and the half-turn rotation (and the identity, of course). The implication for the tile-replacement is that any replacement must have the same symmetry and so we can’t do fancy quarter-turns as results in the dragon curve. The best we can hope for is a rep-tile style replacement where (at least in terms of the original square), the replacements exactly replace the original tile.
The simplest would be to replace one tile by four, but that doesn’t lead to much that is interesting. Tiling by nine is more promising as having three tiles along each side gives more scope for variation. One possibility is shown. Others are possible.
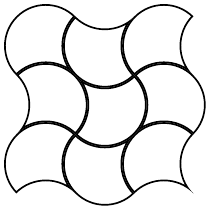
What is interesting is that this replacement scheme provides a reverse of what we saw with the Penrose Tiles. When starting with the 90°–90°–180° tricurve and applying this replacement rule repeatedly, the result looks more and more like the original square.
And Finally …
I’ve learnt, from experience, that mathematical concepts often have multiple ways of being presented and that the first presentation might not always be the “right” one (for some definition of “right”). So I’ve learnt to look at concepts from other angles, turn them over, and see how they appear from different directions. This can shed light on them, reveal connections to other ideas, and help me develop my understanding. This is what I’ve tried to show here with tricurves: looking at them through a different lens reveals connections to ideas I hadn’t expected and has helped me understand them at a deeper level. I hope that it’s shown you a bit of that process and maybe given a few ideas as to how to explore them further.
One Response to “Tessellating Tricurves”